A 3 zone DIY mini split installation doesn't need special tools, training or an HVAC contractor to deal with the refrigerant. This guide walks you through every step of installing a Zone Air multi zone system so you can finish the job with confidence and skip the labor cost you would pay a pro.
Fast Answer
Can You Install a 3 Zone DIY Mini Split Yourself?
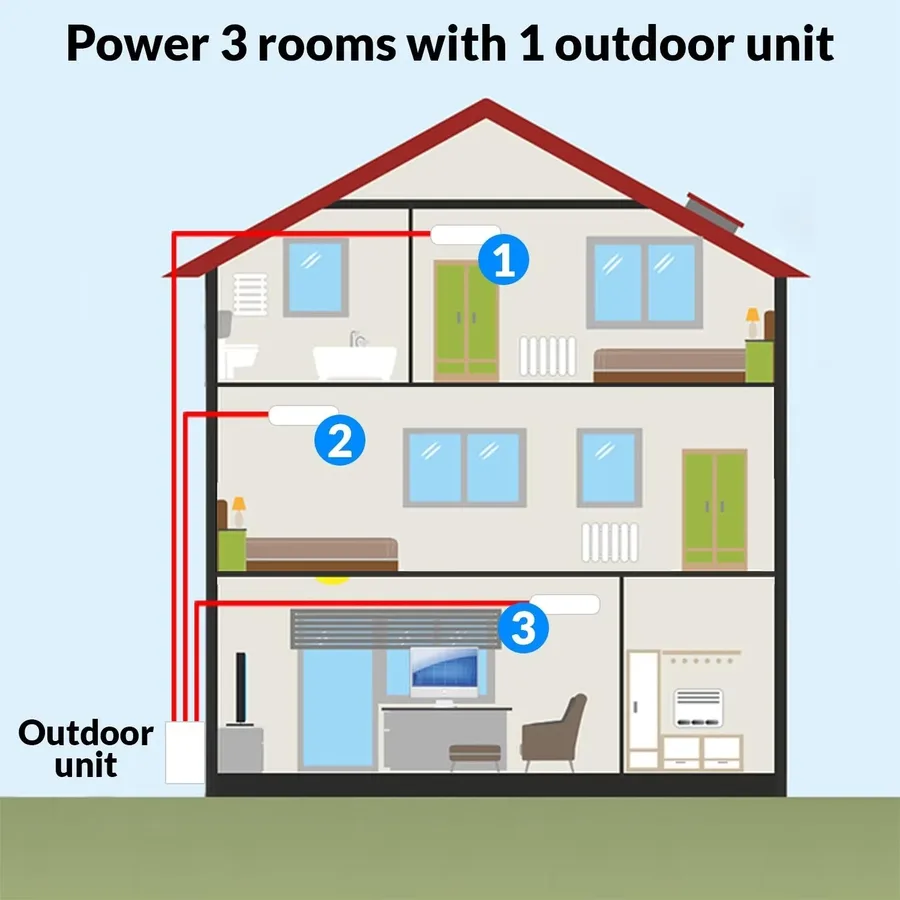
Yes. A careful homeowner can install a 3 zone DIY mini split system from Zone Air over a weekend. Zone Air's own manual says you should allow a full weekend for a first installation. The installation process has seven main steps, and each indoor unit connects to its own marked port on the outdoor condenser.
A 3 zone system gives you independent temperature control in three rooms, which makes it a common layout for homes, shops and finished basements. Zone Air's pre charged line sets ship with quick connect fittings, so no vacuum pump or refrigerant charging is needed. Installation can be done with basic hand tools and no specialized training.
The key steps are simple: mount three indoor air handlers, set the outdoor unit, route and connect all three line sets, open the service valves and finish the electrical work (usually with a licensed electrician for the 230V circuit). Following the Zone Air manual plus this overview can help you avoid the most common DIY mistakes: drainage errors, line set kinks and communication wire mix-ups.
MRCOOL's DIY line also uses pre charged line sets. Its Quick Connect line sets come pre-charged with R-454B and need no vacuuming, according to MRCOOL's catalog. Zone Air's approach gives you the same convenience with custom-cut line set lengths and three head styles to mix on one condenser.
Planning
Planning a 3 Zone DIY Mini Split System
Planning before you buy and installation day is critical. A rushed buy leads to wrong sizing, re-work and code violations.
A multi zone mini split is one outdoor condenser that supports three indoor air handlers, and each one has its own temperature control in its own room. These systems eliminate the need for ductwork and are ideal for multi-room setups and small homes. A 3 zone system gives you flexibility and energy efficiency for homeowners who want whole home comfort without central air.
Sizing guidance:
- 9,000 BTU is for bedrooms or offices (up to about 400 sq ft)
- 12,000 BTU for larger living areas (up to about 550 sq ft)
- 18,000 BTU for open basements or shops (up to about 800 sq ft)
- Zone Air 3 zone systems are rated from 27,000 to 36,000 BTU of connected indoor capacity, all on one 27,000 BTU outdoor unit
Run each room through the sizing calculator before you buy. Ceiling height, insulation and sun exposure can move a room up or down a size.
Placement strategy:
- Indoor units go high on a solid wall that won't shake, with the bottom of the unit 6–8 ft above the floor, away from direct sun and heat sources
- You need a level condenser pad or wall brackets for the outdoor unit (not supplied)
- Outdoor space around the unit per the manual: 20 inches at the discharge face and above the unit, 12 inches at the rear and sides (4 inches at the rear on wall brackets), and about 6 ft of working room on the valve side
- Where snow is expected, raise the condenser on a stand above the drift line
Code, permits and tools:
- Call your local building department and confirm what they require for the mechanical and electrical work, and whether you need a permit
- Tools you need beyond what Zone Air supplies: two adjustable wrenches 10 inches or larger, a drill with a 2½–3⅛ inch hole saw, a 24 inch level, a stud finder, a spray bottle of soapy water, and a ladder. An HVAC torque wrench is preferred but not needed
- Materials usually needed and not supplied: condenser pad or wall brackets, drain hose extension, exterior sealant, UV wrapping tape, breaker, disconnect, conduit and AWG #16 4-core communication cable for each zone. A line set cover kit is optional
Why Zone Air
What Makes Zone Air DIY Multi Zone Mini Splits Different
Traditional mini split installs need vacuum pumps, manifold gauges, brazing equipment and licensed techs. Zone Air's DIY approach gets rid of all of that.
The main thing is pre charged line sets that are sealed with R-454B refrigerant from the factory, plus quick connect fittings that keep the charge in when you connect them right. This lets you install a quick connect system from Zone Air without ever opening the refrigeration circuit. A DIY installation doesn't void the warranty (5-year parts, 7-year compressor). Each indoor unit runs independently. The wall mount 3 zone systems are rated at 24 SEER2 with heating down to -13°F.
Zone Air 3 zone system packages contain:
- One 27,000 BTU outdoor condenser
- Three indoor air handlers with mounting plates, remote controls and the 5 mm Allen key for the service valves
- App-based Wi-Fi control so you can set schedules and monitor each zone
Pre charged line sets are priced separately, one per zone. Standard lengths are 16, 25, 33, 50 and 75 ft, and you can order any custom length from 5 to 75 ft, so you don't have to coil extra line behind the condenser. The 16 ft line set for a 9K or 12K head is $229.99.
Equipment costs run $3,509.99 to $4,909.99 for the system depending on head style (wall mount, ceiling cassette or concealed duct), plus line sets. Compare that to what you would pay a contractor for labor to install and charge a conventional three head system.
Install Steps
Step-by-Step 3 Zone DIY Mini Split Installation
These steps summarize the Zone Air manual. Read the included manual cover to cover before you start, and let the outdoor unit sit upright for at least 24 hours before you power it up.
- Prepare the site. You need to shut off power at the main panel. Set and level a condenser pad or wall brackets. Keep those clearances free of plants, snow and stored items.
- Mount indoor units. For each zone, hold the mounting plate against the wall and use a level to set it. Allow 8 inches of clearance above each unit where possible (4–6 inches is the minimum). Check the wall for wiring, plumbing and gas along the hole path. Pick a wall that gives a straight, downhill drain path to the exterior.
- Drill the line set hole. Use a 2½–3⅛ inch hole saw with a slight downward slope toward the exterior. All three indoor units need their own hole through the wall.
- Route line sets. Unwind each pre charged line set by hand, only as far as your run needs. Keep a minimum bend radius of 4 inches, don't bend any one section more than three times, and label each run (Zone 1, 2, 3) so it goes to the right port at the condenser. Never cut, join or extend a pre charged line set.
- Connect quick connect fittings. Work only in dry weather. Hand-thread each fitting first to avoid cross-threading, then tighten with two wrenches to the torque in the manual's table. Don't use Teflon tape or sealant on these fittings. Connect the indoor end first, then the outdoor end. Each joint is designed to be connected once.
- Hang and finish each indoor unit. Hook the chassis onto the plate, feed the line set, drain line and cable that are bundled together through the wall in a neat way. Secure the drain line with a constant downward slope and no sags.
- Outdoor condenser connections. Lift the unit onto the pad with a helper. Route each line to its marked port and write down which head goes to which port. Once every connection at both ends is tight, remove the valve covers and open both service valves on each connected port with the Allen key, turning counter-clockwise until the stem stops. Both must be fully open. Unused ports stay capped and closed. The wiring diagram printed inside the cover controls every connection.
Electrical: Run a dedicated 208–230V circuit on a 30A double-pole breaker to the outdoor unit. One circuit serves the whole system. Install a disconnect at the condenser, and add a surge suppressor there (the manual recommends it). In most jurisdictions this work must be done by a licensed electrician under permit. Line power lands at the outdoor unit only. Each indoor unit gets its own 4-core communication cable back to its port terminals. Wire the outdoor terminals first, then the indoor and keep the wire colors identical at both ends. A reversed cable shows up as error E0.
Start-up: Spray a soapy water solution on every line set connection and watch for bubbles before you wrap anything. Restore power and test each zone individually in cooling and heating modes. Verify condensate drains from each air handler, then leak check the joints again after the test run.
Tips
Common 3 Zone Mini Split Installation Mistakes and Safety Tips
Even with a quick connect DIY system from Zone Air, attention to detail is what separates a clean install from one that gives you trouble later.
Safety practices:
- Always work with power off when you handle electrical connections, and verify the circuit is dead
- Use proper ladders, eye protection and gloves when you drill and mount items
Common mistakes to avoid:
- Indoor units that are not level, which leads to condensate leaks
- Drain lines that run uphill or have sags that trap water
- Line sets that are kinked, crushed in tight bends or pulled too tight against sharp edges
- Mixing up zone ports at the condenser, so the zones answer the wrong remote
- A service valve that is partly open, which starves the compressor
Pro tips:
- Dry-fit the mounting plates and check stud locations before you drill large holes
- Measure each run before you order so you can get the line set cut to length
- Use line set covers to protect insulation from UV and clean up the look
- Call a professional if your main electrical panel is full or outdated, if you're not comfortable with 230V wiring, or if local code requires a licensed electrician to make final connections
Operating
Operating and Maintaining a Multi Zone Mini Split
Proper operation and maintenance are what keep a mini split running efficiently for years.
Initial operation: Set temperatures independently for each zone using the remote or app. Choose cool, heat, dry or auto mode depending on the season and humidity. Test every indoor unit in both cooling and heating modes after installation.
Routine maintenance:
- Clean or rinse indoor air filters about every month or two
- Gently rinse outdoor condenser coils at the start and end of each cooling season
- Inspect line set insulation and drain lines once a year
Efficiency tips:
- Use programmable schedules to reduce energy use when rooms are empty
- Keep doors and windows closed in conditioned zones
- Set moderate temperatures instead of extreme settings so you get better comfort and lower bills
The same 27,000 BTU Zone Air outdoor unit runs two or three heads, and you can mix wall mount, ceiling cassette and concealed duct heads on one condenser, so you can plan around future room finishes when you pick your heads. By following this guide and the included Zone Air manual, homeowners can confidently install a 3 zone DIY mini split that delivers reliable, tailored comfort in every room, and walk away knowing the project is done right.
Related guides
- Best 3-zone DIY mini split
- Dual zone mini split DIY installation
- Best DIY easy-install multi zone mini split
- Multi zone mini split calculator
- Best DIY dual zone mini split easy install
- Mini split sizing FAQ
Zone Air specifications, prices and installation steps are taken from Zone Air's product pages and the Zone Air DIY Series Installation & User Manual as of October 7, 2026; the printed manual that ships with your system governs. The MRCOOL line set statement is taken from MRCOOL's own published catalog linked above as of the same date and is subject to change. MRCOOL® is a trademark of its owner. This site is owned and operated by Zone Air and is not affiliated with or endorsed by MRCOOL.