Most mini-splits require 220V wiring for operation, which means running new circuits, upsizing breakers, and often hiring an electrician before you even think about refrigerant lines. But some smaller mini-splits run on 110-120V power, and a select few are designed to plug into a standard 3-prong household outlet, as long as that outlet sits on its own dedicated circuit.
This guide walks you through the official installation process for a DIY mini split that can plug into a standard outlet at 120V, using Zone Air's 2026 product line as the reference. If you've been looking for a simpler path to room-by-room heating and cooling, keep reading.
Quick Answer: Can a Mini Split Plug Into a Standard 120V Outlet?
Yes, certain 9,000 to 12,000 BTU Zone Air DIY mini split heat pumps are built to run on 110–120V and can plug into a dedicated 15A outdoor receptacle with the optional 115V power cord kit, where local code allows it. This option is from the factory for these specific models, not as a trick or fix.
That said, not every mini split out there is a plug-in unit. Most 120V mini-splits top out at 9,000 to 12,000 BTU, and anything bigger almost always needs a 208–230V hardwired connection. Before you buy any unit, check the nameplate and installation manual to make sure it's rated for 120V plug-in operation. If you assume you can adapt a 230V unit to a standard outlet, that's dangerous and it'll void your warranty.
When we say "official installation" for a plug-in 120V mini split, we mean:
- Following the manufacturer's step-by-step instructions exactly
- Use only the approved power cord kit (don't use a generic cord or an extension cord)
- Connect it to a dedicated circuit that has the breaker size you need
- Follow the requirements in the NEC (National Electrical Code) and your local building and electrical codes
- Pulling permits and scheduling inspections where your jurisdiction requires them
Even though the system is DIY-friendly and comes with precharged refrigerant lines, you stay responsible for safe mounting, correct electrical connection and any permitting or inspection your area demands. A dedicated circuit is necessary for mini-split systems, and if you skip that requirement it can cause breaker trips, overheating or worse.
Zone Air's 110–120V DIY mini split product line for 2026 includes two models that are built for this kind of install:
- 9,000 BTU - covers up to about 450 sq. ft., 23 SEER2 efficiency, heating down to −13°F, $1,899.99 (October 2026)
- 12,000 BTU - covers up to about 600 sq. ft., same efficiency and cold-climate rating, $1,999.99 (October 2026)
For full specs and sizing on both units, see our 115V DIY mini split review.
Both use R-454B refrigerant (it has a lower global warming potential than R-410A) and ship with a 16 ft quick-connect line set that is factory-precharged and comes in the box.
A 120V plug-in mini split works well for:
- Garages and workshops without 230V service
- Bonus rooms and attic conversions that are far from the ductwork you already have
- Home offices that have a need for independent climate control
- Small apartments and rental units where doing major electrical work just isn't practical
- Basement bedrooms and ADUs are accessory dwelling units
Before You Start: Requirements for a 120V Plug-In DIY Mini Split
Preparation is everything, even with a system designed for you to install yourself. If you skip the checks in this section, you can void your warranty, create electrical hazards or end up with a failed inspection. Zone Air's 5-year parts and 7-year compressor warranty covers DIY installs, as long as you follow the included instructions, all applicable codes and required permits.
Here is what you need to confirm and gather before you drill a single hole.
Electrical Requirements
- Check the voltage and amperage that are on the nameplate. For 110–120V operation, the unit must be listed. A 120V mini-split usually needs a 15-amp or 20-amp circuit, and Zone Air's 115V models specify a dedicated 15A circuit.
- Dedicated circuit only. It is recommended that you use dedicated circuits for 120V mini-splits so you don't overload the line. That means the breaker that runs your outdoor receptacle serves nothing else. There can't be lights, other outlets or a garage door opener on that same line.
- Outdoor receptacle specs. For the outlet, it must be weather-resistant and it has to be installed in an in-use (bubble) cover, and it must be GFCI-protected per NEC 210.8(F). This requirement applies to all outdoor dwelling-unit outlets on single-phase branch circuits that are up to 150V to ground and 50A or less.
- Disconnect considerations. Electrical safety codes may require an outdoor disconnect switch for mini-splits, depending on where you live. Some areas accept the plug itself as a disconnect, but others want a separate shut-off within sight of the outdoor unit. Check with your local authority having jurisdiction (AHJ).
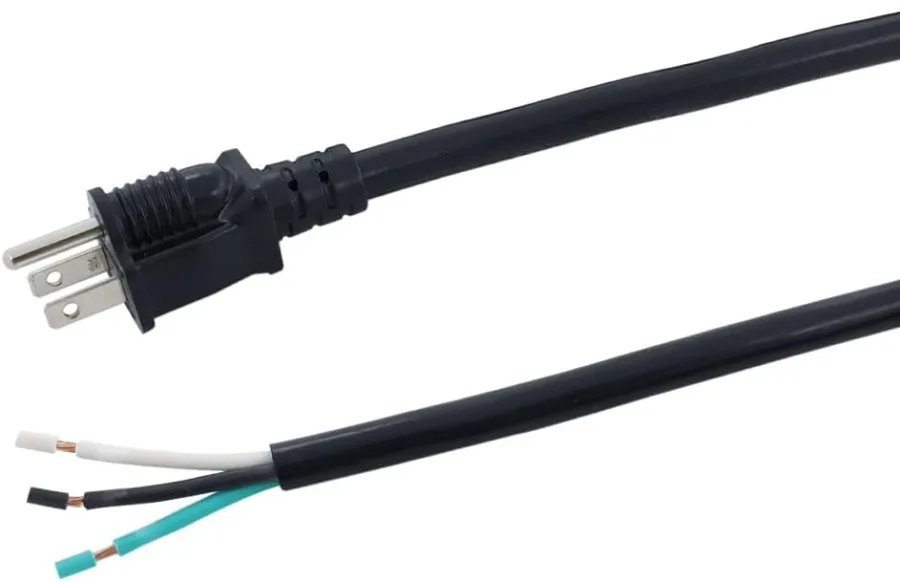
- Approved power cord only. You need to use only the power cord kit that the manufacturer approved for 120V. Zone Air offers a 6 ft, 12 AWG, NEMA 5-15P cord for this purpose. If you use an extension cord with a mini-split, it can start a fire. Power strips are not allowed, and wiring that is too small is not allowed, and daisy-chaining is not allowed either.
Consulting an electrician is recommended for the electrical setup, especially if you need to add a new circuit or outdoor outlet to your panel. Many areas need a licensed electrician for this work even if the mini split itself is something you do yourself.
Code and Permit Considerations
- Local building codes may require permits for installation. Many municipalities require both a mechanical permit (for the HVAC unit) and an electrical permit (for new circuits or outlets).
- Some jurisdictions restrict what qualifies as homeowner-performed work. Even if Zone Air's warranty allows self-installation, your local code might still require a licensed installer for certain tasks.
- Unpermitted work can cause problems during home sales, insurance claims and future inspections. Treat the permit as part of the project cost, not an optional add-on.
Climate and Capacity Planning
- A 120V supply limits how much cooling you can get for small rooms or zones. Zone Air's 9,000 BTU model covers up to about 450 sq. ft., and the 12,000 BTU model covers up to about 600 sq. ft. - but these figures assume average insulation and window area.
- Do a load calculation or at least run a sizing calculator to figure out what size mini-split you need. Manual J calculations take into account the size of the room, the R-values of the insulation, how many windows there are and which way they face, and the local climate data. A mini-split that is too big will short-cycle and waste energy, and a mini-split that is too small will not be able to cool your space effectively.
- Zone Air's 115V models can heat down to −13°F. If you live somewhere that regularly gets colder than that, you will need to plan for auxiliary or backup heating.
Site and Mounting Preparation
- Indoor unit location: Identify stud locations, confirm wall construction can support the air handler's weight, and ensure clearances from the ceiling, side walls and doors as specified in the manual. Indoor mini-split units should avoid direct sunlight and heat sources, which can interfere with the thermostat sensor.
- Outdoor unit location: Mini-split outdoor units need room for airflow around them. Keep the condenser away from dryer vents, gas meters or anything that could block airflow. In cold climates, raise it up above the height where snow usually piles up.
- Line set length: Zone Air comes with a 16 ft precharged line set with both the 9K and 12K BTU models. If that's not the right length, Zone Air will cut a pre-charged line set to the exact length you measure, any whole foot from 5 to 75 ft, and every length is one continuous factory-sealed run, not an extension. On the 9K and 12K, the indoor and outdoor units can sit up to 33 ft above or below each other. Measure the actual path your lines will take (vertical runs plus horizontal runs), not the straight-line distance between units. Order the correct length before the unit arrives - changing length later means ordering a different precharged line set.
Tools and Materials to Gather
- Mounting bracket and hardware are in the box
- A good drill with a 3 inch hole saw to make the hole through the wall
- Torpedo level
- Two adjustable wrenches for the quick-connect fittings (an HVAC torque wrench set to the manual's spec is better if you have one)
- Line set cover kit and mounting clips
- Condensate drain tubing
- Wall sleeve and sealant (putty or silicone)
- Basic electrical tools if you or your electrician will install the receptacle
Step-by-Step Official DIY Installation of a 120V Plug-In Mini Split
This guide follows the general sequence for a DIY system that comes from the factory with refrigerant already in it and quick-connect fittings, like Zone Air. Your unit's specific manual is the final authority, so read it cover to cover before you start. Zone Air's FAQ puts a first-time single-zone wall install at 4–6 hours for two people, and about 3 hours once you've done one.
Putting in a 120V DIY mini-split is simpler than putting in a 230V system, mainly because you get to avoid the heavy-gauge wiring, the double-pole breakers and the concerns about panel capacity that come with higher-voltage equipment. But simpler doesn't mean you can slack off, and every connection still matters.
Mount the Indoor Air Handler
- Use the manufacturer's paper or cardboard mounting template to mark the points where you will drill on the wall. Find at least two studs so you can anchor it securely.
- Indoor units should be mounted about seven feet above the floor so the air has more room to spread out and the unit stays above head height.
- Level the wall bracket carefully. Even a slight tilt can cause problems with the way condensate drains away.
- Drill the combined pass-through hole (usually 2.5–3 inches in diameter) for the line set, the drain hose and the cable that carries power and communication. Angle this hole with a slight downward slope toward the outside so water drains to the outside, not into the inside of your wall.
- Put in a wall sleeve to protect the lines and give you a clean way to get through the wall.
Place the Outdoor Unit
- Set the condenser on a level concrete pad, a factory wall bracket or blocks that dampen vibration. For the compressor to run right, the unit must be stable and level.
- You'll need to keep the manufacturer's minimum space from walls, fences and obstructions on all sides, especially in front of where the fan blows out.
- Keep the unit away from dryer vents and gas meter outlets, and don't put it where leaves or debris pile up.
- In climates where it gets below freezing, position the unit above the expected snow line or install it on blocks that are tall enough to keep snow from covering the coil.
Route Precharged Quick-Connect Line Sets
Pre-charged DIY mini-split systems usually use quick-connect fittings that eliminate the need for brazing, flaring, vacuum pumps or field refrigerant charging. This is one of the core advantages of systems like Zone Air: installing mini-split systems may need certified technicians for refrigerant handling with conventional equipment, but precharged quick-connect systems avoid that requirement completely.
- Gently unwind the precharged line set. Avoid sharp turns or kinks, because lines that get damaged cannot be repaired in the field.
- Feed the lines through the wall sleeve from outside and connect them to the indoor unit first, or do it the way your manual says.
- Run the lines along the outside wall and hold them in place with line set covers or clamps that you put up every few feet.
- Refrigerant lines for mini-splits have to have good insulation and protection. Keep the insulation sleeves in one piece, and cover any bare spots so they don't break down from UV or sweat.
- Hook up the quick-connect fittings between the indoor unit and the outdoor unit. They are color-coded or matched so you can tell which one goes where. Each one has to be tightened to the torque your manual calls for. Zone Air's fittings are tested for leak resistance at 400 PSI, but if you don't torque them right on your end you can still have trouble.
- Follow the sequence in your manual for opening the valves to release the R-454B refrigerant that was charged at the factory. This is the last step of the refrigerant work and it takes a few minutes.
No vacuum pump, manifold gauges or field refrigerant charging is required with a DIY, precharged system like Zone Air. This alone saves the vacuum pump and gauge kit, which Zone Air's FAQ puts at $400–600 to rent or buy, plus a technician's visit for the refrigerant work.
Handle the Condensate Drain
- Hook the indoor unit's drain barb to the drain hose that came with the unit.
- Gravity drainage works best for condensate management in mini-splits. Route the hose with a continuous slope down to an approved termination point outside - a garden bed, floor drain or dedicated condensate line.
- Condensate drains have to slope right or you'll get water damage. Don't put in loops, kinks or uphill parts that will make traps. If you can't do gravity drainage because of where the unit sits, put in a condensate pump.
- Make sure the drain termination point is visible and accessible so you can inspect and clean it later.
Hook Up Power (120V Plug-In Setup)
- Have a licensed electrician put in a dedicated 15A, 120V outdoor receptacle near the outdoor unit. It has to be weather-resistant, it has to be in an extra-duty weatherproof enclosure. It has to be GFCI-protected.
- Connect Zone Air's factory-approved power cord (6 ft, 12 AWG, NEMA 5-15P) to the power terminal block on the outdoor unit and run it to that receptacle. The power is going to the outdoor unit, not the indoor wall unit. You'll want to follow the wiring diagram in your manual so you get hot, neutral and ground right at the terminal block.
- Check that the wiring is hooked up right and the ground is good at the receptacle before you plug it in.
- Label the breaker in your electrical panel so it's easy to see what it is for (for example, "Mini Split for the Garage" or "Mini Split for the Office").
- Double-check that the size of the breaker is the same as the MOCP rating on the nameplate.
Safety Checks Before Startup
Before you restore power, you can walk through this checklist:
- All mechanical fasteners are tight (wall bracket, condenser mounting, line set clamps)
- Line set insulation is in good shape with no exposed copper
- Seal the wall penetration with putty or silicone so air, water and pests can't get through.
- Condensate drain hose is connected, sloped and ends in a safe place
- You'll need to put all of the panels and covers back on the indoor unit and the outdoor unit.
- With the breaker labeled, make sure it is in the OFF position
- The GFCI receptacle has been tested (press TEST, then RESET)
- Plug is all the way in the receptacle with the strain relief secure
Initial Commissioning
- Flip the breaker to ON and allow the system to sit powered for a few minutes before commanding operation (some units require a brief initialization period).
- You can use the remote control or smartphone app to set the system to cooling or heating mode.
- Check that the outdoor fan turns and that the compressor starts without any weird vibration, rattling or grinding.
- In cooling mode you should feel cold air from the indoor unit within several minutes, and in heating mode warm air should follow shortly.
- Listen for any noises that sound off and watch for error codes on the display.
- If the system shows fault codes, shut down and consult the troubleshooting section of the manual before calling support. Do not attempt to open refrigerant connections.
Is a 120V Plug-In Mini Split Right for You? Performance, Safety and Zone Air Advantages
A 120V plug-in DIY mini split isn't the right solution for every situation, but it hits a sweet spot for a lot of homeowners. If you've got an older home without spare 230V circuits, or you need heating and cooling in a detached workshop, or you want to add comfort to a bonus room without extending ductwork, this category of product was built for you. Renters with the property owner's permission, ADU owners and anyone converting a garage into a space they can live in will also find the 120V plug-in approach a lot more practical than running 230V service from the main panel.
120V Plug-In vs. 230V Hardwired Mini Splits
| Feature | 120V Plug-In (Zone Air) | 230V Hardwired (Traditional) |
|---|---|---|
| Voltage | 110–120V, standard 3-prong outlet on a dedicated circuit | 208–230V, dedicated circuit |
| Typical capacity | 9,000–12,000 BTU | 9,000–36,000+ BTU |
| Electrical work | Dedicated 15A outlet (simple for an electrician to add) | New 230V circuit, double-pole breaker, possible panel upgrade |
| Refrigerant handling | Precharged quick-connect (no vacuum pump or gauges) | Vacuum pump, manifold gauges, certified technician for the refrigerant |
| Multi-zone | Single-zone only at 120V | Multi-zone systems connect multiple indoor units to one outdoor unit |
| Efficiency (premium models) | 23 SEER2 (Zone Air) | 20–24 SEER2 |
| DIY feasibility | High | Low to moderate |
The main limitation is the capacity trade-off. If you need to condition more than about 600 sq. ft. from a single system, or if you want multi-zone coverage, you'll need to step up to 230V equipment, which usually means hiring an electrician for the new circuit. That said, 230V doesn't have to mean you need a pro to install the refrigerant side. Zone Air's 230V units have the same pre-charged quick-connect line sets. The 9K and 12K get to 24 SEER2. As of October 2026, its multi-zone systems are the only DIY mini split that lets you mix wall-mount, ceiling cassette and concealed ducted units on one outdoor unit.
Safety and Code Compliance
Even plug-in systems must comply with NEC, state and local codes. The fact that the installation is physically simpler does not reduce what you are legally required to do for safety:
- Outdoor receptacles must be GFCI-protected and weather-resistant
- Some areas define what counts as DIY versus professional work, so it's worth checking before you start
- NEC 210.63 requires a 125V receptacle within 25 feet of outdoor HVAC equipment to facilitate servicing
- Some building departments will also require a Manual J load calculation as part of the permit application
Zone Air's Advantages for 2026
Zone Air stands out in the 120V plug-in DIY category for several reasons:
- True 110–120V operation on a dedicated 15A circuit, with an optional plug cord kit that the factory approved
- Factory-precharged quick-connect lines are cut to any whole foot from 5 to 75 feet, and each one is a single continuous run, so you can eliminate vacuum pumps, refrigerant charging and specialized HVAC tools
- 23 SEER2 efficiency at 115V (Zone Air's 230V 9K and 12K reach 24), and this is competitive with many 230V models that cost a lot more to install
- Cold-climate heating down to −13°F, so these can work as primary heat in well-insulated spaces in fairly cold climates, and cooling in outdoor temperatures up to 131°F for hot garages and work spaces
- There are two capacity options: 9,000 BTU for rooms up to about 450 sq. ft. and 12,000 BTU for rooms up to about 600 sq. ft.
- DIY-friendly warranty: 5-year parts and 7-year compressor coverage with no registration deadline, and installing it yourself does not void it provided the instructions, codes and permits are followed
- R-454B refrigerant has a lower global warming potential, so it meets the environmental regulations that are in place now
- Indoor noise is as low as about 30 dB in mute mode, which is about the level of a whisper
- 30-day returns on uninstalled units and free shipping to the lower 48, sold direct from the manufacturer with live technical support
Zone Air's 115V models can plug into a dedicated 15A outlet with the optional cord kit, where MRCOOL's 115V 9K and 12K units are hardwired. Plug-in still means where local electrical code allows it, and never through an extension cord. The tradeoff to know: at 115V Zone Air is rated at 23 SEER2, against 24 for its 230V models.
Ongoing Maintenance
Once you have it installed, keeping your system running efficiently needs minimal but consistent attention:
- Air filters should be cleaned monthly for best performance
- Condenser coils need to be cleaned at least once a year. You can handle most buildup with a garden hose and a soft brush
- Drainage lines should be checked regularly to prevent clogs that can cause water damage or the system to shut down
- Annual professional maintenance is recommended for mini-split systems, even ones that are DIY-installed, to verify refrigerant charge integrity, electrical connections and overall system health
When to Call a Professional
Not every situation calls for a DIY approach. Bring in a licensed HVAC technician or electrician if you:
- Aren't sure about any electrical work, especially adding new circuits or outlets
- Have difficult wall construction (masonry, stone, structural steel)
- You'll need to get a new 230V circuit for a larger unit or for a multi-zone system.
- Encounter error codes, refrigerant smells or performance issues after start-up
- Your local area needs a licensed installer no matter what kind of system it is.
A 120V plug-in DIY mini split like Zone Air removes most of the barriers that have traditionally kept homeowners from installing their own heating and cooling. The combination of standard household voltage, precharged quick-connect refrigerant lines and a warranty that covers self-installation makes this a genuinely accessible project for capable DIYers.
That said, "accessible" is not the same as "optional corners to cut." Follow the installation manual precisely, install on a dedicated circuit with proper GFCI protection, pull the permits your jurisdiction requires, and maintain the system consistently. Do those things, and you get high-efficiency, zone-controlled comfort, with the confidence that your work is code-compliant and warranty-protected.
Ready to get started? Review the Zone Air 110V DIY mini split lineup, check your local permit requirements, and measure your line set routing before you order. A comfortable, efficient room is a weekend project away.
Related guides
- 115V DIY mini split (9K & 12K review)
- Best 120V DIY mini split
- Best quick connect mini split
- Best mini split for a garage
- Best mini split for a bedroom
- What is SEER2?
Specs and warranty terms are manufacturer-published as of October 2026, subject to change; verify before purchase. MRCOOL® is a trademark of its owner; Zone Air is not affiliated with or endorsed by MRCOOL.